Using "Landed Cost" in Zoho Inventory
How can I allocate landed cost in Zoho Inventory?
Landed cost of a product is the total cost involved in bringing a product to the seller’s warehouse apart from the cost of goods. This is usually the freight, shipping charges, customs and other charges that the seller may incur till he procures the goods.
Tracking the landed cost helps determine the overall cost incurred in procuring the product. This, in turn, helps you to decide the selling price for your stock without compromising your profits.
You must first enable landed costs for your organization. To do so:
- Click the Gear icon in the top-right corner.
- Select Preferences » Items.
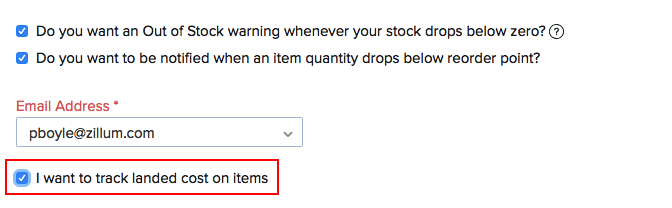
- Tick the checkbox for the option I want to track landed cost on items.
- Click Save to apply the changes.
Note: Ensure that you have enabled inventory tracking for the items for which you wish to allocate landed costs.
Allocating Landed Costs
Once you have enabled Landed Costs for your organization, you will be able to add and allocate them to the items in your bills.
Step 1: Adding Landed Costs to Bills
- Go to Bills.
- Create a new bill and enter the items.
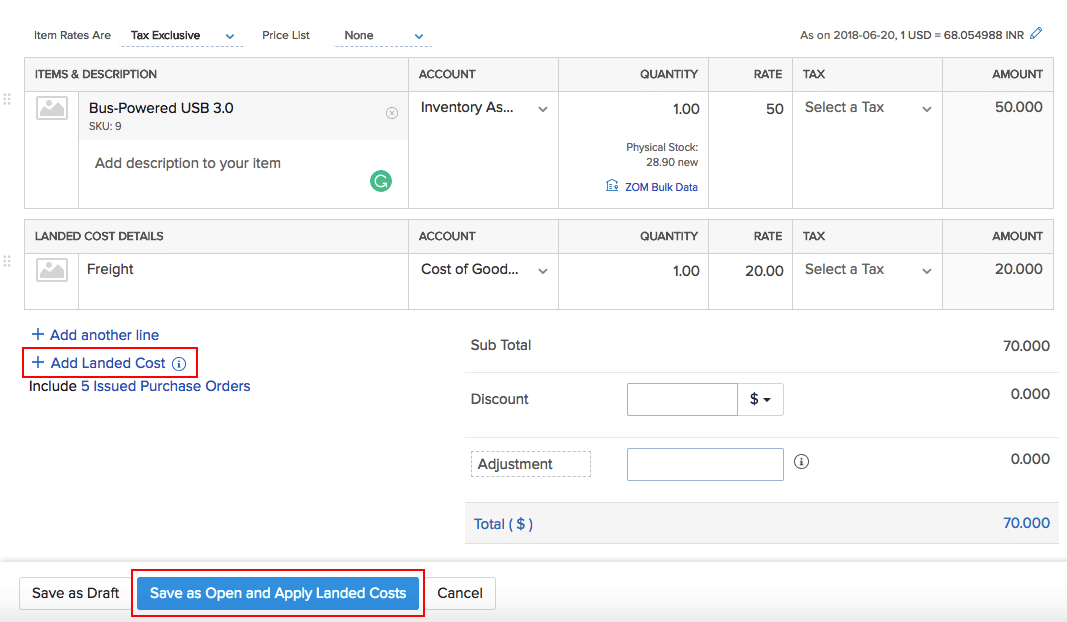
- Click + Add Landed Cost and enter the additional cost incurred (Eg. Freight). You can create and add a new service item for it or choose an item that you might have created already.
- Click Save as Draft or click Save as Open and Apply Landed Costs to allocate the costs to items. Note: landed costs can be allocated only to the inventory-tracked items.
Step 2: Allocating Landed Costs to Items in the Bill
Once you have added the landed costs to a bill, you will be able to allocate them to the bill items proportionately. There are two ways to do this:
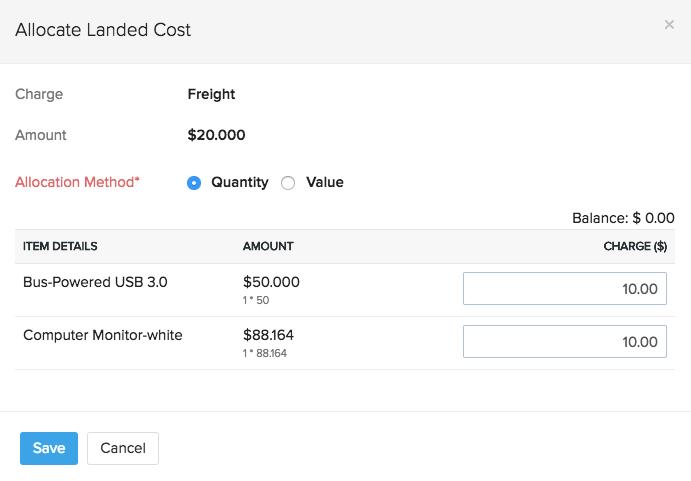
1) Allocating landed costs while creating a bill:
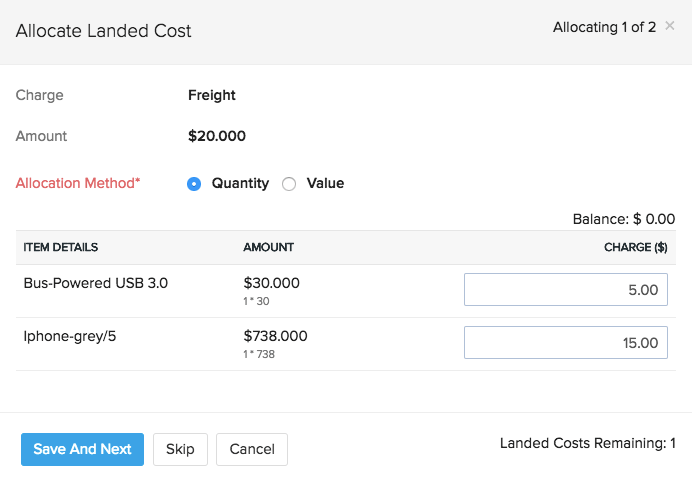
- Create a new bill with landed costs and click Save as Open and Apply Landed Costs.
- In the popup, you can allocate the landed costs to the bill proportionately based on the value or quantity of the items.
- Edit the Charge fields if you would like to make changes to the costs calculated.
- Click Save & Next if there are more than one landed costs to be allocated.
- Click Skip if you wish to allocate the landed cost later.
- Click Save.
Insight: You can also choose not to allocate any landed costs to that particular bill and allocate them to other bills.
2) Allocating the landed costs to an existing bill:
- Click the Allocate Landed Costs button on your bill details page.
- Allocate the charges proportionately to each item and click Save.
Note: You can also edit bills created earlier to add landed costs to them and allocate it.
Allocating Landed Costs from One Bill to Another
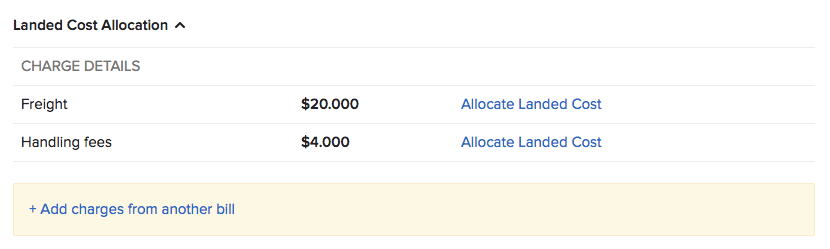
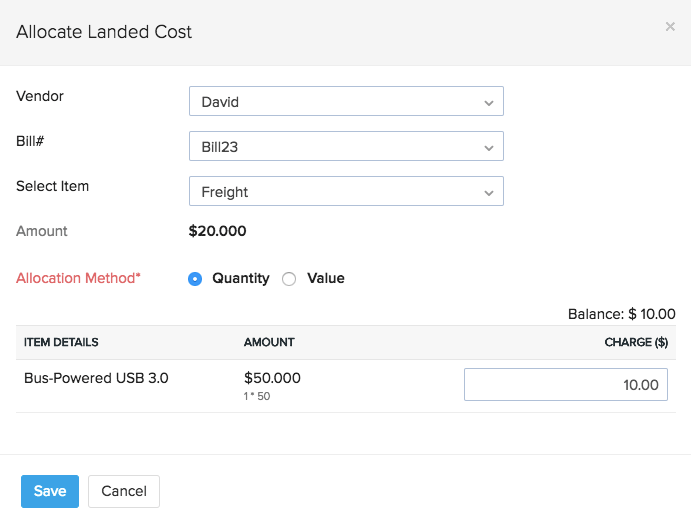
There may be cases where your vendor does not offer any shipping for the product and you get it shipped by another shipping agency, in that case, you can create a separate bill with just the landed costs and apply them to another bill. You can also apply any unused landed costs from other bills. To do this:
- Go to the particular bill to which you want to allocate the landed cost.
- Click the More dropdown and click Add Landed Costs.
- Select the Vendor, the Bill number from which you would like to allocate the cost, and the landed cost.
- Allocate the landed costs proportionately and click Save.
Related Articles
Get Ready to Sell on the Go with Zoho Mobile
. A mobile CRM is not a downsized version of the desktop CRM. It’s a more specialized and dedicated platform aimed at higher productivity. In the mobile version, you concentrate on what matters most. In this ebook, find out about the useful features ...Zoho Inventory - Inventory Summary Report Status Definitions
In Zoho Inventory, the **Inventory Summary Report** provides an overview of stock levels and movements for items across your warehouses. The report includes various status definitions that describe the state of inventory items based on specific ...Barcode Scanner Integration to Zoho Inventory
Zoho Inventory supports bar code scanning in the web app. Here is how it works: For Line Items: Prerequisite: You have to key in the bar code of the item as the SKU of said item in Zoho Inventory manually or using a barcode scanner. Open a new ...Zoho Inventory: Advanced Features Videos
Zoho Inventory Walk-Thru Video: (50 min) https://youtu.be/rEo_89YTd98 Zoho Inventory Connector to Amazon Overview Video (5 min) https://youtu.be/Dzf1oCOTmW8 Zoho Inventory Multi-Channel Order Management Video (32 min): https://youtu.be/kVuxnIXBPhQZoho One Limits for Locations, Warehouses, Zones, and Bins in Zoho Inventory
Below is a summary of the key limits for inventory structuring features within Zoho One, specifically as they apply when using Zoho Inventory and related modules. 1. Locations Current Limit: Zoho now refers to both "Locations" and "Branches" for ...